- Replacing a shower head is a quick, affordable upgrade that can improve water pressure, reduce water usage, and instantly refresh your bathroom.
- You should consider replacing the shower head if you notice weak pressure, leaks, mineral buildup, uneven spray, or if your fixture is old or outdated.
- Gather basic tools before you start, including an adjustable wrench, Teflon tape, a cleaning brush, and a towel to catch drips.
- Proper installation depends on cleaning the shower arm threads, applying Teflon tape correctly, and tightening the new shower head without over-tightening to avoid damage.
- If the shower head is stuck, use penetrating oil, a strap wrench, or gentle heat; avoid twisting the shower arm to prevent plumbing damage.
- For specialized setups like handheld or rain shower heads, additional parts like a bracket or extension arm may be needed, and heavier fixtures require extra support and secure connections.
- Low water pressure can often be fixed by cleaning or replacing the shower head, but persistent pressure issues may indicate a larger plumbing problem that requires professional help.
Replacing a shower head is one of those home improvement tasks that sounds complicated until you actually do it. Then you realize it’s fast, affordable, and can completely change your shower experience. Whether you’re dealing with low water pressure, a leaking fixture, or just want an upgrade, this guide will walk you through everything you need to know to replace a shower head like a pro.
This is the ultimate guide for homeowners — with clear steps, practical tips, and troubleshooting advice. By the end, you’ll be confident enough to tackle this project in under an hour.
Why Replace a Shower Head?
A shower head is more than just a water outlet. It affects water pressure, flow, and your overall comfort. Many homeowners overlook this simple upgrade, but replacing a shower head can:
- Improve water pressure and flow
- Reduce water usage and lower bills
- Reduce hard water buildup and mineral deposits
- Upgrade your bathroom’s style instantly
- Improve your shower’s overall performance
Even if your shower seems fine, a new shower head can feel like a complete bathroom makeover.
How Do You Know It’s Time to Replace Your Shower Head?
Here are the most common signs:
- Weak water pressure even after cleaning
- Leaking from the shower head or connection
- Visible mineral buildup or discoloration
- Water spray pattern is uneven
- Old or outdated style
- You want a new feature like a rain shower or handheld sprayer
If you’re seeing any of these, it’s a good time to replace the shower head.
What You Need Before You Start
Before you begin, gather your tools and materials. This will make the process smoother and faster.
Tools and Materials
- Adjustable wrench or pliers
- Teflon (plumber’s) tape
- Cleaning brush or old toothbrush
- Rag or towel
- New shower head
- Bucket or towel (to catch drips)
- Optional: pipe thread sealant
Optional Upgrades to Consider
- Water-saving shower head (low-flow)
- Handheld shower head
- Rain shower head
- Dual shower head system
- High-pressure shower head
Choosing the right shower head is the first step to a better shower experience.
How to Choose the Right Shower Head
Choosing a shower head isn’t just about looks. You need to consider:
Water Pressure
If your home has low water pressure, choose a shower head designed for low-flow systems or a high-pressure model.
Shower Type
Think about how you like to shower:
- Rain shower: Gentle, wide spray
- Handheld: Flexible, great for cleaning and pets
- Dual head: Combination of rain and handheld
- High-pressure: Strong spray, great for rinsing
Flow Rate and Water Efficiency
Look for the WaterSense label. This ensures the shower head is efficient and helps you save on water bills.
Finish and Style
Shower heads come in:
- Chrome
- Brushed nickel
- Matte black
- Oil-rubbed bronze
Choose a finish that matches your bathroom fixtures.
Step-by-Step Guide: How to Replace a Shower Head
Replacing a shower head is one of the simplest home upgrades you can do. The trick is to take your time and follow the steps carefully so you avoid leaks or damage. Here’s a detailed walkthrough.
Step 1: Turn Off the Water (Optional)
Most shower head replacements don’t require shutting off the home’s water supply. However, turning off the water can make the process cleaner and less stressful.
Why you might want to turn it off:
- Avoid unexpected sprays when you loosen the old shower head
- Keep the bathroom dry, especially if the connection is loose or corroded
- Reduce the risk of water damage if the connection breaks or leaks
If you decide not to shut off the water, here’s what to do:
- Place a towel on the floor and in the tub
- Keep a small bucket nearby
- Turn the shower on briefly before you start to relieve any pressure in the line
Tip: If your shower head is connected to a diverter valve (like a tub/shower combo), turning off the water can prevent water from suddenly coming out of the tub spout.
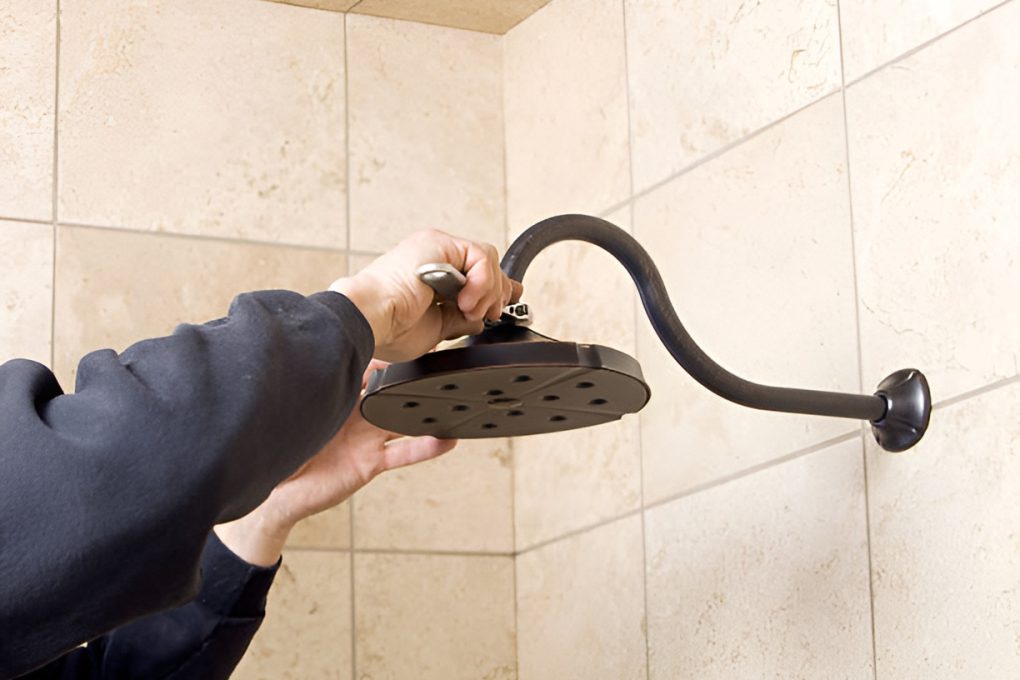
Step 2: Remove the Old Shower Head
This is the step where most people get stuck — especially if the shower head has been in place for years.
What you need:
- Adjustable wrench or pliers
- Cloth or rag (to protect the finish)
- Optional: penetrating oil for stubborn fixtures
How to remove it:
- Hold the shower arm (the pipe sticking out of the wall) with one hand to prevent it from twisting.
- Wrap a cloth around the shower head to protect the finish from scratches.
- Use your wrench or pliers to turn the shower head counterclockwise.
- If it’s stuck, don’t force it. Try one of these methods:
- Apply penetrating oil and wait 10–15 minutes
- Use a strap wrench for better grip without scratching
- Apply gentle heat with a hair dryer (not too hot, and avoid plastic parts)
- Once it loosens, unscrew it the rest of the way by hand.
Important: Do not twist the shower arm. Twisting the arm can loosen or damage the plumbing inside the wall.
Step 3: Clean the Shower Arm Threads
Even if the old shower head comes off easily, mineral buildup often remains on the threads. Cleaning this is essential to ensure a tight seal.
Why cleaning matters:
- Prevents leaks
- Helps the new shower head tighten correctly
- Prevents corrosion and damage to the threads
How to clean the threads:
- Use a wire brush or old toothbrush to scrub off mineral deposits
- For heavy buildup, soak a rag in vinegar and wrap it around the threads for 15–20 minutes
- After soaking, scrub again and wipe dry
Make sure the threads are:
- Clean
- Dry
- Smooth (no jagged edges)
If the threads are damaged or stripped, consider replacing the shower arm.
Step 4: Apply Teflon Tape (Plumber’s Tape)
This is the step that prevents most leaks. Teflon tape creates a tight seal between the shower arm and the shower head.
How to apply Teflon tape correctly:
- Hold the shower arm steady.
- Wrap the tape around the threads clockwise (the same direction you will screw on the shower head).
- Apply 2–3 layers of tape.
- Press the tape into the threads with your fingers to smooth it out.
Tips for success:
- Keep the tape tight and smooth — avoid wrinkles
- Do not overlap too much or wrap too many layers (this can make it hard to screw on the shower head)
- Make sure the tape does not extend beyond the end of the threads
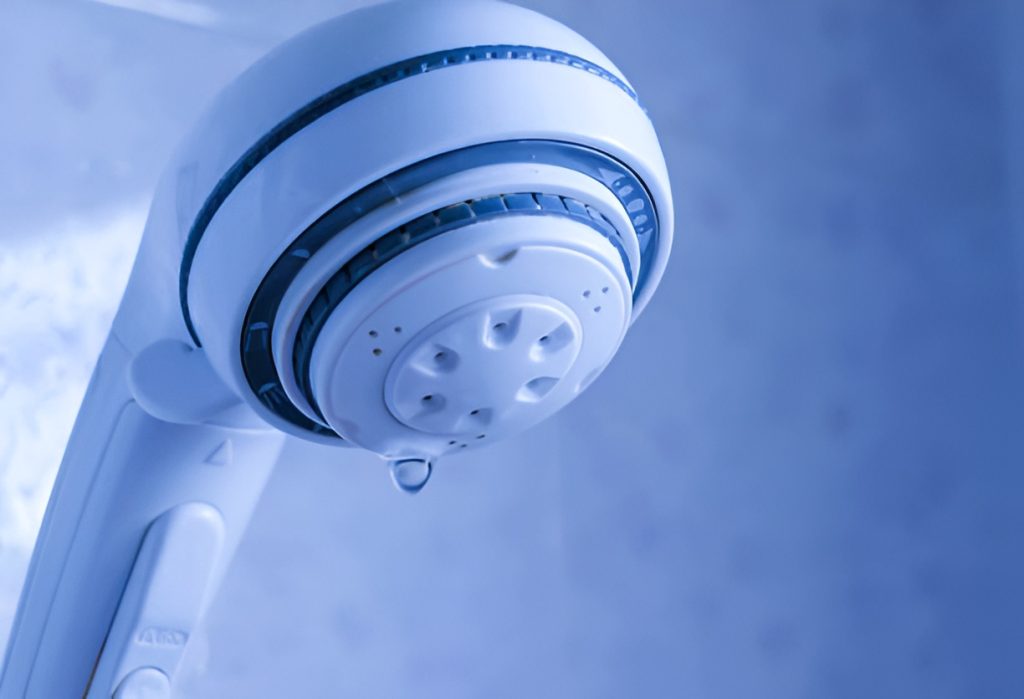
Step 5: Install the New Shower Head
Now comes the fun part — installing your new shower head.
How to install:
- Align the shower head with the shower arm threads.
- Thread it on clockwise by hand.
- Once it’s hand-tight, use your wrench for final tightening.
- Tighten only a quarter to half turn with the wrench.
Important:
- Do not over-tighten. Over-tightening can:
- Crack the shower head
- Strip the threads
- Damage the shower arm
- If you feel resistance, stop tightening and check alignment.
If your new shower head comes with a rubber washer, make sure it’s properly seated before tightening.
Step 6: Test for Leaks
Once installed, you must check for leaks. This is the step where you’ll catch any mistakes before they become a problem.
How to test:
- Turn on the shower and let the water run for 1–2 minutes.
- Check the connection area for leaks:
- Around the threads
- Along the base of the shower head
- If water is dripping, tighten slightly and test again.
If leaks persist:
- Turn off the water
- Remove the shower head
- Reapply Teflon tape (make sure it’s wrapped correctly)
- Reinstall and retest
Common leak causes:
- Improper Teflon tape direction
- Not enough tape
- Cross-threaded connection
- Damaged threads on the shower arm
Quick Troubleshooting Checklist
If you’re still seeing problems after installation, use this checklist:
- Is the shower head tight enough?
Tighten gently with a wrench. - Is the tape wrapped correctly?
It must be clockwise. - Are the threads clean and dry?
Clean and reapply tape. - Is the shower arm damaged?
Consider replacing the arm. - Is the shower head cracked?
Replace it — even a small crack can leak.
How Long Does It Take to Replace a Shower Head?
A typical shower head replacement should take:
- 15–30 minutes for most homeowners
- 45–60 minutes if there’s mineral buildup or a tight connection
It’s a quick upgrade with a big impact.
Common Mistakes to Avoid
Even simple projects can go wrong if you rush. Here are common mistakes:
Not Using Teflon Tape
This is the most common cause of leaks.
Over-Tightening
Over-tightening can strip threads or crack the shower head.
Ignoring Mineral Buildup
Mineral buildup prevents a tight seal and can damage threads.
Not Checking Compatibility
Not all shower heads fit all shower arms. Make sure the connection size matches.
What If the Shower Head Won’t Come Off?
This is common, especially in older homes.
Try these options:
- Use penetrating oil (like WD-40)
- Use a strap wrench to avoid damage
- Wrap the shower arm with a towel to protect it
- Apply heat (carefully) to loosen the connection
If it still won’t budge, it may be time to call a plumber.
How to Replace a Shower Head With a Handheld Attachment
Handheld shower heads offer flexibility, convenience, and a better shower experience for families, pets, and anyone who needs a targeted spray. They require a slightly different installation process because you’re adding a hose and bracket, not just swapping out a fixed shower head.
Tools and Materials Needed
- Adjustable wrench or pliers
- Teflon (plumber’s) tape
- Handheld shower kit (usually includes a hose, bracket, and handheld head)
- Optional: small bucket or towel to catch drips
- Optional: silicone grease (for rubber washers)
What to Check Before You Start
Before you begin, confirm your shower arm is compatible with the handheld kit. Most kits fit standard 1/2-inch shower arms, but it’s always best to verify.
Step-by-Step Installation
Step 1: Remove the Old Shower Head
- Use a cloth to protect the finish on the shower head.
- Hold the shower arm steady.
- Turn the shower head counterclockwise using a wrench.
- Remove the shower head completely.
If it’s stuck, use penetrating oil and wait 10–15 minutes before trying again.
Step 2: Clean the Shower Arm Threads
Mineral buildup is common and prevents a proper seal.
- Scrub the threads with a toothbrush or wire brush
- Use vinegar if needed for heavy buildup
- Dry the threads completely
Step 3: Apply Teflon Tape
Wrap the threads with 2–3 layers of plumber’s tape in a clockwise direction. Smooth the tape with your fingers so it lays flat.
Step 4: Install the Handheld Bracket
Most handheld kits come with a bracket that screws onto the shower arm. This bracket is what holds the handheld shower head.
- Screw the bracket onto the shower arm clockwise
- Tighten by hand, then give it a final quarter turn with a wrench
Make sure the bracket is positioned so the handheld head will sit comfortably at a natural height.
Step 5: Connect the Hose
Now attach the hose to the bracket and handheld shower head.
- Ensure rubber washers are inside the hose connectors
- Screw the hose onto the bracket and the handheld head
- Tighten by hand first, then gently tighten with a wrench
Tip: Avoid over-tightening the hose connectors. The rubber washers need to seal properly, and over-tightening can cause leaks.
Step 6: Attach the Handheld Head
Slide the handheld shower head into the bracket holder. Most brackets allow for angle adjustment.
Step 7: Test for Leaks
Turn the water on and check for leaks at:
- The bracket connection
- Both hose ends
- The handheld head
If you see leaks:
- Turn off the water
- Tighten the connection slightly
- Reapply Teflon tape if needed
Handheld showers are great for cleaning, bathing pets, rinsing shampoo, and improving accessibility in the bathroom.
How to Replace a Shower Head in an Older Home
Older homes often come with charm — and plumbing that needs extra care. When replacing a shower head in an older home, you’re likely to run into issues like corrosion, mineral buildup, and fragile pipes.
Common Issues in Older Homes
- Corroded pipes that are brittle or weakened
- Mineral buildup that makes fixtures hard to remove
- Fragile connections that can break if forced
- Non-standard parts or outdated fittings
Even with these challenges, replacing a shower head is still possible with the right approach.
Tips for Older Homes (Best Practices)
Use a Strap Wrench
A strap wrench helps you apply force without scratching or damaging the fixture.
Apply Penetrating Oil
If the shower head is stuck, apply penetrating oil (like WD-40) and let it sit for 15–20 minutes before attempting removal.
Avoid Over-Tightening
Older pipes are often weaker. Over-tightening can:
- Crack the shower arm
- Strip the threads
- Break the connection
Tighten only until the connection feels secure.
Consider Replacing the Shower Arm
If the shower arm is corroded or damaged, it may need to be replaced. This will give you a cleaner, more reliable connection and prevent leaks.
Step-by-Step for Older Plumbing
- Loosen slowly and avoid sudden force
- Clean the threads carefully
- Use Teflon tape to ensure a seal
- Install the new shower head gently
- Test for leaks and adjust
Older plumbing requires extra care, but with patience and the right tools, replacement is still doable.
How to Replace a Shower Head to Improve Water Pressure
Low water pressure is one of the most common reasons homeowners replace their shower head. Sometimes the issue is the shower head itself, not the plumbing.
Common Causes of Low Water Pressure
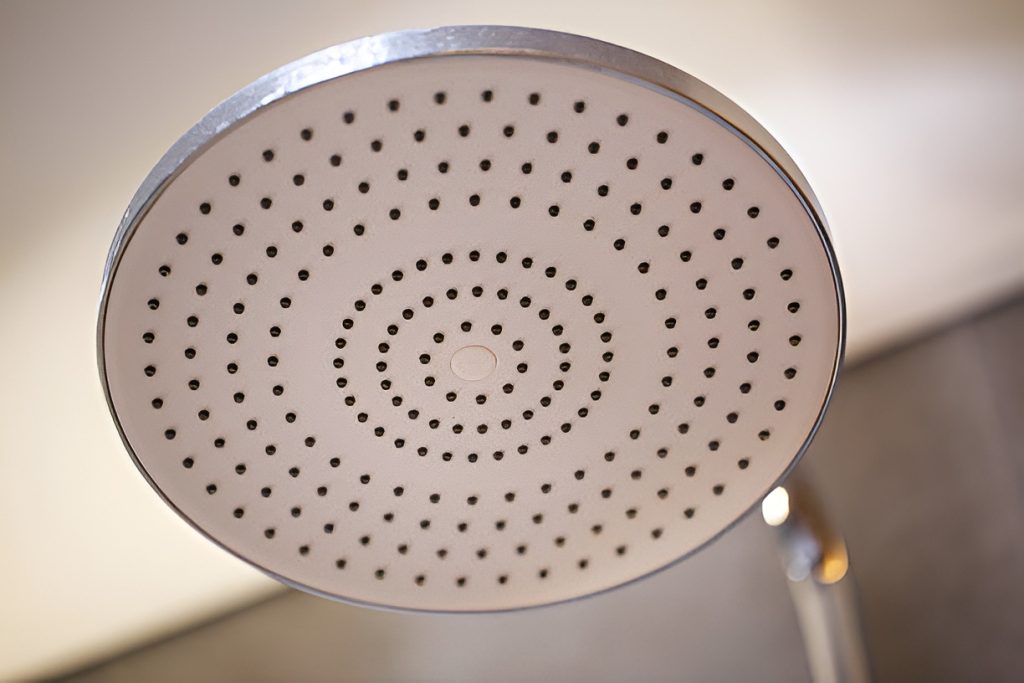
- Mineral buildup inside the shower head
- Old or clogged shower head
- Low-flow shower head design
- Water pressure issues in the home (not the shower head)
How to Diagnose the Cause
Before you replace the shower head, you can test whether the problem is the fixture or the plumbing.
Try this:
- Remove the shower head and turn on the water briefly.
- If water pressure is strong without the shower head, the issue is likely the fixture.
- If pressure is still low, it may be a plumbing issue or your home’s water pressure is low.
Solutions to Improve Water Pressure
Clean the Shower Head
If mineral buildup is the issue:
- Soak the shower head in vinegar for 30 minutes
- Scrub the nozzles with a toothbrush
- Rinse and reinstall
Replace With a High-Pressure Shower Head
High-pressure shower heads are designed to maximize flow and force without wasting water.
Choose a Shower Head Designed for Low-Pressure Systems
Some shower heads are specifically engineered to work well with low-pressure water systems.
Check Home Water Pressure
If you suspect a larger issue:
- Check water pressure at other faucets
- Consider consulting a plumber if multiple fixtures have low pressure
What’s the Best Shower Head for Low Water Pressure?
Look for:
- High-pressure shower heads
- Shower heads with smaller nozzles
- Aerated shower heads
These designs help increase the feel of pressure without increasing water usage.
How to Replace a Shower Head With a Rain Shower Head
Rain shower heads are popular because they deliver a wide, gentle spray that feels like standing in the rain. But because they are larger and heavier than standard shower heads, they require a slightly more careful installation.
What You Need
- Rain shower head
- Shower arm extension (often needed for proper positioning)
- Teflon (plumber’s) tape
- Adjustable wrench
- Optional: strap wrench
- Optional: extra support bracket if your wall mount needs reinforcement
Step-by-Step Installation
Step 1: Remove the Old Shower Head
- Turn the shower head counterclockwise using a wrench.
- Protect the finish with a cloth or towel.
- Remove the old shower head completely.
Step 2: Clean the Shower Arm
Mineral buildup is common, and it prevents a tight seal. Clean the threads with:
- A wire brush
- An old toothbrush
- Vinegar soak for heavy buildup
Make sure the threads are clean, smooth, and dry.
Step 3: Apply Teflon Tape
Wrap the shower arm threads with 2–3 layers of plumber’s tape, wrapping clockwise (same direction as installation). Smooth the tape so it lays flat.
Step 4: Install the Extension Arm (If Needed)
Rain shower heads often sit higher and farther out than standard heads. If your shower arm doesn’t extend far enough:
- Attach a shower arm extension to the shower arm
- Tighten by hand first, then a quarter turn with a wrench
- Ensure the extension is stable and level
Step 5: Attach the Rain Shower Head
- Thread the rain shower head onto the extension or shower arm
- Hand-tighten first, then finish with a wrench
- Avoid over-tightening (this can crack the head or strip threads)
Step 6: Test for Leaks
Turn the water on and check for leaks around the connection.
If you see leaks:
- Tighten slightly
- Add more Teflon tape if needed
- If leaks persist, inspect for cracked threads or damaged parts
Rain shower heads can be heavier, so ensure the connection is secure and the shower arm extension is stable. If the arm feels loose, tighten carefully or replace the shower arm.
How to Replace a Shower Head Without Damaging the Wall
If you’re concerned about damaging tile, grout, or the wall during installation, follow these protective tips. This is especially important in bathrooms with delicate finishes or older tiles.
Protective Tips Before You Start
- Use a towel or cloth to protect finishes and prevent scratches.
- Avoid excessive force when loosening or tightening.
- Use tools that won’t scratch the shower arm or wall.
- Tighten gently and stop when the connection feels secure.
- Replace only the head, not the arm, unless absolutely necessary.
Step-by-Step Safe Replacement
- Place a towel or cloth in the tub to catch any falling tools or debris.
- Use a strap wrench instead of metal pliers if you’re worried about scratches.
- Loosen the shower head slowly, applying steady pressure rather than jerking motions.
- Clean the threads carefully without using harsh tools that could scratch tile.
- Apply Teflon tape and reinstall the new head.
- Tighten gently and test for leaks.
The goal is to avoid stripping threads or damaging the shower arm, which can cause leaks and lead to costly repairs. If you notice any cracks or damaged threads, consider replacing the shower arm or consulting a plumber.
How to Replace a Shower Head to Save Water
If you want to reduce water usage without sacrificing your shower experience, replacing your shower head is one of the easiest upgrades you can make.
Why Low-Flow Shower Heads Work
Modern low-flow shower heads are designed to:
- Use less water
- Maintain strong pressure
- Improve efficiency with advanced nozzle design
Benefits of Replacing Your Shower Head for Water Savings
- Lower water bills
- Less energy usage (because less hot water is used)
- Reduced environmental impact
- A strong spray if chosen correctly
How to Choose a Water-Saving Shower Head
Look for:
- WaterSense-certified models
- Flow rates around 1.8 to 2.0 gallons per minute (GPM)
- Models with adjustable spray settings
Installation Steps (Same as Standard Replacement)
- Remove the old shower head
- Clean the shower arm threads
- Apply Teflon tape
- Install the new low-flow shower head
- Test for leaks
Once installed, you’ll likely notice the difference in water usage right away.
How to Replace a Shower Head for a Spa-Like Experience
Want your bathroom to feel like a luxury spa without a full remodel? Replacing your shower head is one of the fastest and most impactful upgrades you can make.
Options for a Spa-Like Shower
Consider these upgrades:
- Rain shower head for a relaxing, wide spray
- Dual shower system for a powerful and flexible experience
- Adjustable spray settings for massage and mist options
- Handheld attachment for added flexibility and comfort
How to Choose the Right Spa Shower Setup
Think about how you want to feel in the shower:
- Do you want a gentle, rain-like experience?
- Do you want a strong, massaging spray?
- Do you need a handheld option for convenience?
Installation and Experience Tips
- Choose a shower head that matches your water pressure
- Consider adding a shower arm extension for better placement
- Install a handheld attachment for added flexibility
- Use a high-quality shower head to avoid leaks and reduce maintenance
These upgrades make your bathroom feel like a spa without a full remodel. With the right shower head, you can improve your daily routine and make your bathroom feel more luxurious.
What Should You Do If Your New Shower Head Still Leaks?
Here are troubleshooting steps:
Check the Teflon Tape
- Remove the shower head
- Reapply tape
- Ensure the tape is wrapped tightly
Check for Cracks
Inspect the shower arm and new shower head for cracks or damage.
Tighten Properly
Hand-tighten first, then use a wrench. Do not over-tighten.
Replace the Shower Arm
If the threads are damaged, replacing the shower arm may be necessary.
How Often Should You Replace a Shower Head?
Most shower heads last:
- 5–10 years with normal use
Replace sooner if:
- Mineral buildup is severe
- Water pressure decreases
- The spray pattern becomes uneven
- It starts leaking
Regular replacement ensures better performance and hygiene.
The Best Time to Replace a Shower Head
Consider replacing your shower head when:
- You notice low water pressure
- Your shower head is leaking
- You’re remodeling the bathroom
- You want to save water
- Your current shower head is old or outdated
Replacing a shower head is a simple upgrade with immediate benefits.
Final Thoughts
Replacing a shower head is one of the easiest and most rewarding home upgrades. It’s quick, affordable, and improves daily comfort. Whether you want better water pressure, a new style, or a water-saving model, this guide gives you everything you need to replace your shower head with confidence.
If you follow the steps, avoid common mistakes, and choose the right shower head for your needs, you can finish the project in under an hour — and enjoy a better shower instantly.